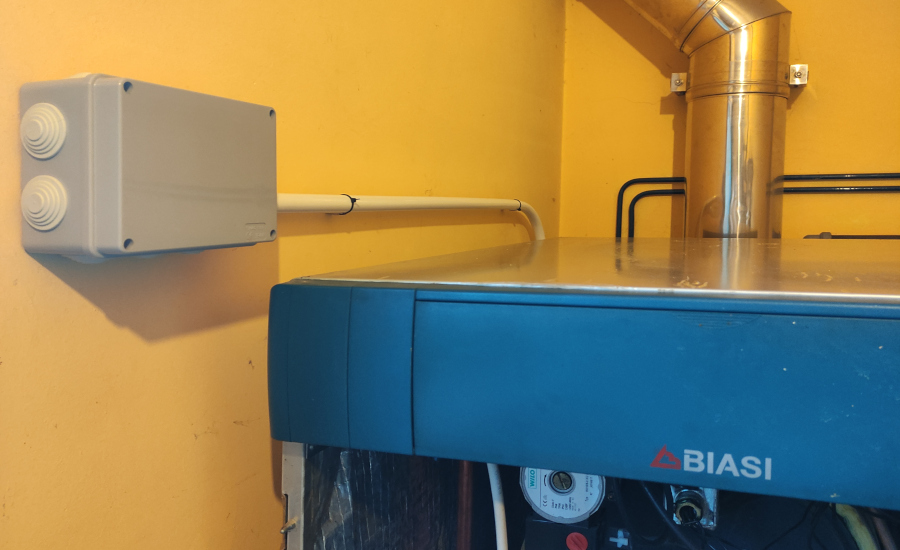
The heating system is in a different builng than the router and I was experiencing some WiFi coverage issues (the WiFi signal needs to cross two metallic window blinds…).
To diagnose the WiFi coverage is very useful the wifi_signal sensor in ESPHome:
sensor:
  - platform: wifi_signal
    name: Wifi Signal
    update_interval: 60s
It was showing a WiFi signal of -95 dBm in the board: This is very low, and it was experiencing some disconnections.
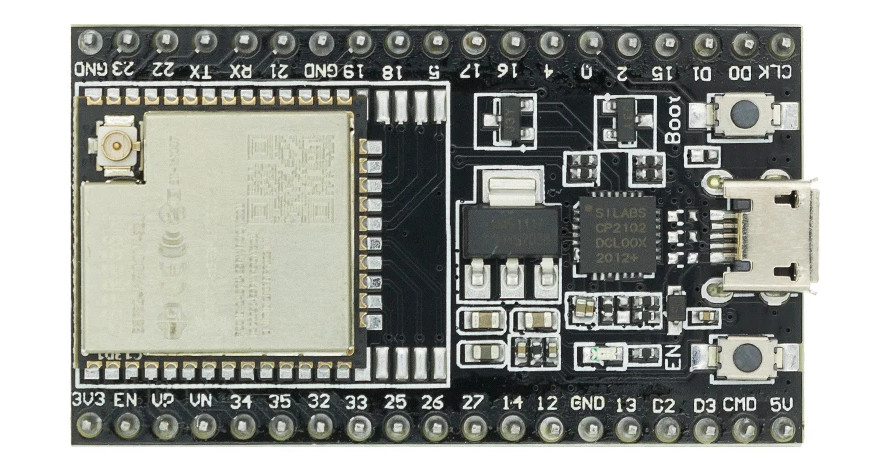
Usually the ESP32 boards have an antenna integrated in the board, but the ESP32-WROOM-32U has an IPEX connector for an external antenna:
So, I spent less than 10 EUR in Aliexpress buying (affiliate links):
Two years ago I started to need controlling my home heating system while I’m not at home. I could go the easy way and buy a couple Nest thermostats, but I preferred the DIY way.
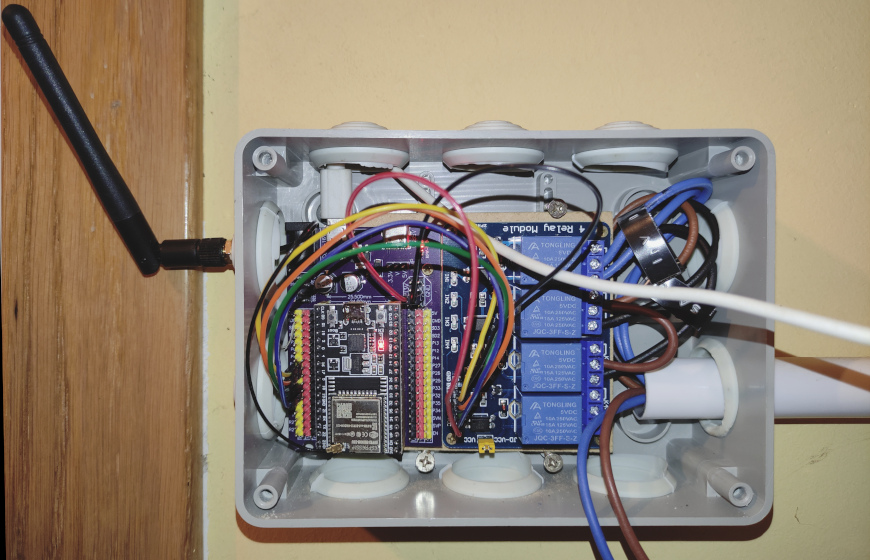
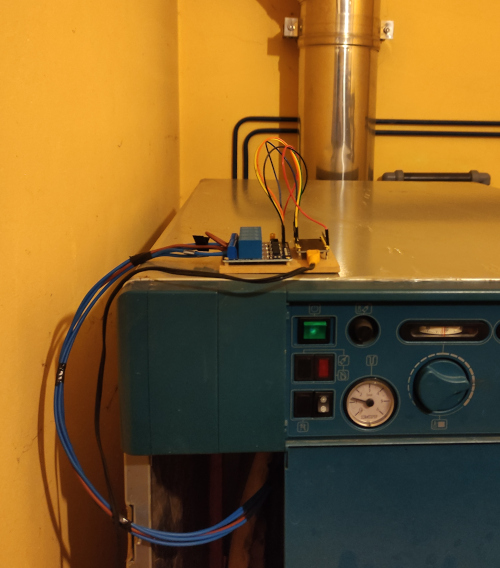
Connecting the boiler to the ESP32 via the relay module
ESP32 board with ESPHome
I connected the boiler to a ESP-WROOM-32 board via a relay module. The box and the cables were more expensive than the board (~10 EUR) and the relay module (~5 EUR).
The ESP32 board is running ESPHome: https://esphome.io/. I think it is a very nice project and very easy to setup. All the configuration is done via YAML files. The board is connected to the home WiFi and it has a fallback hotspot.
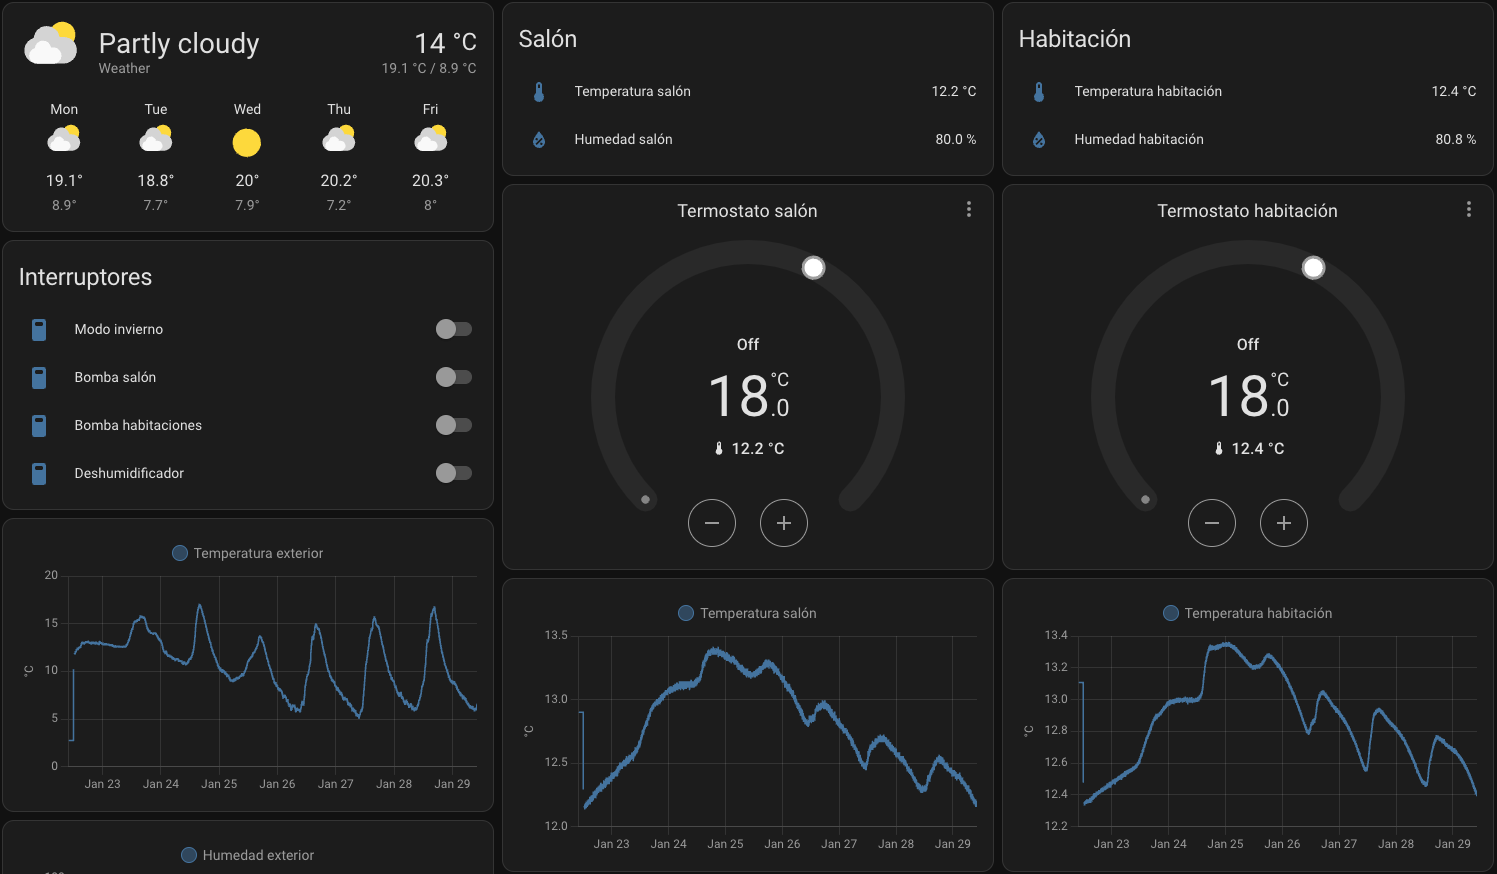
My home heating system has two radiating floor zones with two independent pumps. I also decided to automate the boiler’s “Winter mode”, in this mode the boiler heats the water for the heating, and I wanted to disable it when the heating is not working.
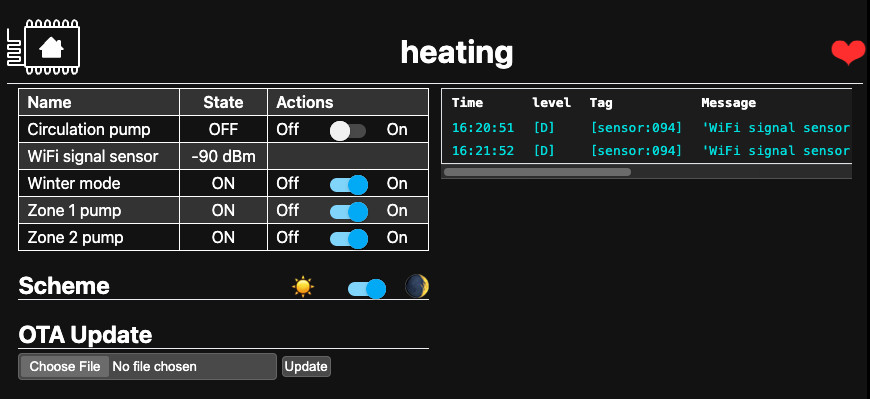
ESPHome has a nice web UI
In my case I needed to activate the winter mode when any pump is working and keep it working for a period of time after the pump is off.
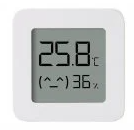
To measure the temperature in the rooms, I used two Xiaomi Mi Home Bluetooth Thermometer 2 (~6 EUR each). They transmit the temperature via BLE (Bluetooth Low Energy) beacons.
Their LCD display is very convenient and, as they are battery powered, you can place them in the better part of the room. I flashed them with this custom firmware:
The control, reading the thermometers and activating the pumps, is done via a Home Assistant (HA) running in an old X86 tablet with Ubuntu (this is usually run in a Raspberry Pi or similar…).
I installed HA in a Docker container, this is my script to update and start the container:
Home assistant reads the thermometers via the Passive BLE monitor integration: https://github.com/custom-components/ble_monitor that can be easily installed via HACS (the Home Assistant Community Store). I needed a Bluetooth 5 USB adapter.
Then, I needed to setup two thermostats in HA via the config/configuration.yaml file:
I played many years with MythTV and XMBC, and now on our new home and after buying a TV, I finally decided to switch to XBMC. I will explain all my choices for those of you who want to build your own media center:
HARDWARE
Plasma TV 42″ Full HD Panasonic TX42S20: about 630 eur (but I got it by only 460 eur!). Plasma TV’s are now quite cheap and they offer a great image quality (much, much better than any LCD, believe me).
Logitech X-540 5.1 speakers: 94 eur, very affordable. They are an old model but what I like of this is that they are wall mountable. They have only one sound input, so I connected them to the computer and the TV audio output with the Line Input of the computer (with a RCA to mini-jack cable, 2 eur). I needed to make some extension cables with RCA connectors to reach the speakers positions. Theoretically these speakers haven’t enough watts for the room, but it has great sound quality and makes up for it.
My OLD computer, an Athlon 2 GHz with an ATI Radeon 9550 (with DVI output) and a SB Live 5.1. I needed also a HDMI cable (10 eur) and a DVI to HDMI converter (15 eur). Curiously this “slow” computer is able to play video to a FullHD 1920×1050 output. I’m planning to get a Home-PC case, at the moment the PC is in a corner of the room.
An Iomega external USB Hard Disk of 1 TB: 95 eur. My old computer hadn’t enough disk space for music & movies. I could have bought a Multimedia Disk, but XBMC is much more pretty and you can also configure it for gaming.
For many years I used MythTV with a TV-tuner card on my computer, but I hadn’t a TV. There are only two features of MythTV not avaiable on XBMC: TV tuning and TV recording: having a TV I need no more the tuning, and I was not using the TV recording (there is nothing enough interesting on TV).
XBMC is a very cool media center available for Windows, Linux and Mac. I installed it over a Debian (because I’m a Linux Fan) but is easy to install on any OS. Is skinnable and has many plugins to add funcionality. Now I am using the default Confluence skin and the Launcher plugin for my games (Performous, Stepmania…) and Emulators (Mame, Mess…). This required some simple bash scripting to create all the launcher config.
Ok, this is a very funny hobby and I spent lots of hours choosing an configuring but the result is very good!
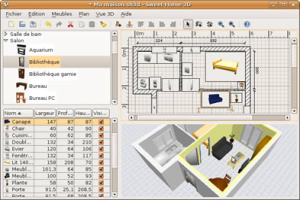
En el mundillo de diseño de hogares es una alegría encontrarse ¡al fin! con uno open source, y que además está hecho en mi lenguaje de programación favorito, Java. Se trata de una aplicación muy fácil de usar, muy apropiada para no profesionales y aunque sólo vale para interiores, la mayoría de la gente es lo que tiene que decidir de su casa, la decoración interior, ya que las paredes y el exterior suelen venir impuestos.
Mediante la tecnología Java Web Start, el programa se puede ejecutar directamente desde su propia página web, http://sweethome3d.sourceforge.net/, siempre que se tenga Java instalado.
Hay una gran cantidad de modelos de objetos para utilizar con el programa, muchos descargables desde varias webs dedicadas al tema, por lo que se puede utilizar para el diseño integral de baños, cocinas, etc. En definitiva, una buena alternativa a otros programas 3d para el diseño de casas.